

Table of Contents
- Introduction: Why Highlighter is Your New Best Friend
- Step 1: Prep Your Canvas – The Skincare Secret
- Step 2: Choose Your Weapon – Types of Highlighters
- Step 3: Location, Location, Location – Where to Apply Highlighter
- Step 4: Application Techniques – Less is More (Usually!)
- Step 5: Blend, Blend, Blend – The Key to a Seamless Glow
- Conclusion: Glow Forth and Conquer!
Introduction: Why Highlighter is Your New Best Friend
Okay, let's talk highlighter. Not the neon yellow kind you used in school (though, if that's your vibe, you do you!). We're talking about the magical makeup product that can take you from "just woke up" to "glowing goddess" in a matter of seconds. It's like having a personal lighting crew follow you around, except instead of a bulky spotlight, you have a chic compact or a sleek tube.
Highlighter, when used correctly, can seriously elevate your makeup game. It's all about adding dimension and luminosity to your face, catching the light in just the right way to enhance your features. Think of it as sculpting with light, rather than shadow (which is what contouring does). It’s subtle, yet impactful. Like a good dad joke, it might not be obvious, but it makes everything better.
But, like any powerful tool, highlighter can be intimidating. One wrong move, and you can go from subtly radiant to… well, let’s just say *disco ball*. This guide is here to prevent that. We're going to break down the art of highlighting into five easy steps, so you can achieve that perfect, natural-looking glow, every single time. Plus, I'll share some product recommendations along the way to help you find your perfect match.
Step 1: Prep Your Canvas – The Skincare Secret
Before you even *think* about picking up that shimmery goodness, you need to prep your skin. This is arguably the most important step, and sadly, the one most often skipped. Think of your skin as a canvas. Would you paint a masterpiece on a dusty, uneven surface? Absolutely not! The same applies to your face.
A well-prepped base ensures your highlighter will apply smoothly, blend seamlessly, and last longer. It's like the primer for your house paint – it makes everything that goes on top look a thousand times better.
Cleanse Deeply Yet Gently
Start with a clean slate. Use a gentle cleanser that suits your skin type to remove any dirt, oil, or leftover makeup from the night before. A clean face is a happy face, and happy faces glow better. It's science. (Okay, maybe not *science* science, but you get the idea.)
Exfoliate Away the Dullness
Exfoliation is *crucial* for a smooth, even glow. Dead skin cells can build up on the surface of your skin, making it appear dull and preventing your highlighter from reflecting light properly. There is physical exfoliation, as well as chemical exfoliation. It really depends on personal preference and we highly encourage trying different products to discover your favourite.
Exfoliating 1-2 times a week is recommended. Here are a few options for you.


Hydration is Key
After cleansing and exfoliating, your skin is thirsty! Replenish its moisture with a good hydrator. A well-hydrated complexion will look plumper, smoother, and more radiant, providing the perfect base for your highlighter. Even if you have oily skin, don't skip this step! Dehydrated skin can actually *overproduce* oil, leading to a greasy look. Choose a moisturizer that’s suitable for your skin type – a lightweight gel for oily skin, a richer cream for dry skin.
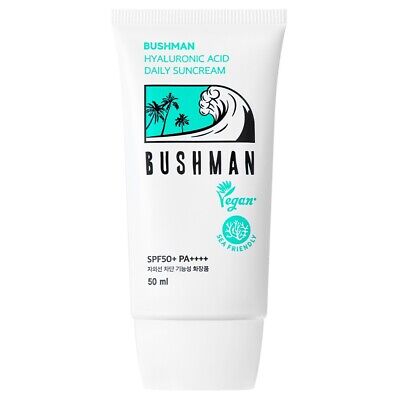
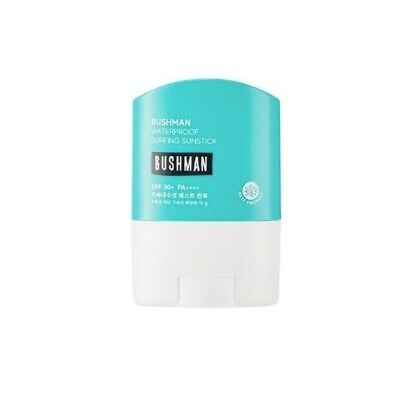
Sunscreen, Always!
This is non-negotiable, folks. Sunscreen protects your skin from harmful UV rays, preventing premature aging, dark spots, and other damage. Plus, healthy skin naturally glows better! Apply a broad-spectrum SPF 30 or higher as the final step in your skincare routine, *before* your makeup. There are some amazing sunscreens out there that are lightweight, non-greasy, and work beautifully under makeup.
Here is my personal recommendation:
Step 2: Choose Your Weapon – Types of Highlighters
Now for the fun part – choosing your highlighter! There are several different types, each with its own unique texture and finish. The best one for you will depend on your skin type, personal preference, and the desired level of glow.
Powder Highlighter
This is probably the most common type of highlighter, and it's a great option for beginners. Powder highlighters are easy to apply and blend, and they come in a wide range of shades and finishes, from subtle shimmer to intense sparkle. They're generally best for normal to oily skin, as they can help absorb excess oil.
Cream Highlighter
Cream highlighters offer a more dewy, natural-looking glow. They're great for dry or mature skin, as they won't settle into fine lines or wrinkles. They tend to be more pigmented than powder highlighters, so a little goes a long way. You can apply them with your fingers, a sponge, or a brush.
Liquid Highlighter
Liquid highlighters are the most versatile option. You can apply them directly to your skin for an intense glow, or mix them with your foundation or moisturizer for an all-over radiance. They're great for all skin types, but be sure to choose a formula that's compatible with your skin (e.g., oil-free for oily skin). Be careful, a little goes a *long* way. You don’t want to accidentally look like you’ve been dipped in glitter (unless that’s your goal, of course!).
Stick Highlighter
Stick highlighters are perfect for on-the-go application. They're creamy and blendable, and they offer a precise application, making them ideal for highlighting specific areas like the brow bone or cupid's bow. They're generally best for normal to dry skin.
Step 3: Location, Location, Location – Where to Apply Highlighter
Now that you've chosen your highlighter, it's time to figure out where to put it. The goal is to highlight the high points of your face – the areas where light naturally hits. This will create a lifted, sculpted effect and enhance your natural features.
Here are the key areas to focus on:
- Cheekbones: This is the most common place to apply highlighter. Sweep it along the top of your cheekbones, starting from the apples of your cheeks and extending towards your temples.
- Brow Bone: A touch of highlighter under your brow bone will lift your eyes and make them appear larger and more awake.
- Inner Corner of Eyes: A tiny dab of highlighter in the inner corners of your eyes will brighten your entire eye area.
- Bridge of Nose: A thin line of highlighter down the bridge of your nose will make it appear slimmer and more defined. Be careful not to go too heavy here, as it can easily look unnatural.
- Cupid's Bow: A touch of highlighter on your cupid's bow (the little dip above your upper lip) will make your lips appear fuller and more defined.
- Chin: A small amount of highlighter on the center of your chin can add balance to your face, especially if you've highlighted your cheekbones and nose.
And Remember to have fun when applying them! Don't be afraid to highlight and try out new things.

Step 4: Application Techniques – Less is More (Usually!)
The key to a natural-looking highlight is to start with a light hand. You can always add more, but it's much harder to take it away. Remember, we're aiming for "subtly radiant," not "tin foil extravaganza."
Powder Application
Use a fan brush or a small, fluffy brush to apply powder highlighter. Tap off any excess product before applying it to your skin. Sweep the brush lightly over the high points of your face, building up the intensity gradually.
Cream Application
You can apply cream highlighter with your fingers, a sponge, or a brush. If using your fingers, warm the product up between your fingertips before applying it to your skin. This will help it blend more seamlessly. If using a sponge or brush, use a stippling motion to apply the product, rather than rubbing it in.
Liquid Application
Liquid highlighter can be applied directly to your skin with a dropper or applicator, or you can mix it with your foundation or moisturizer. If applying it directly, use a small amount and blend it out quickly with your fingers, a sponge, or a brush. If mixing it with your foundation or moisturizer, start with a small amount and add more as needed.
Step 5: Blend, Blend, Blend – The Key to a Seamless Glow
This is where the magic happens. Blending is *essential* for a natural-looking highlight. You want to avoid any harsh lines or obvious patches of shimmer. The goal is for the highlighter to melt seamlessly into your skin, creating a soft, diffused glow.
Use a clean brush, sponge, or your fingers to blend out any edges. For powder highlighter, use a fluffy brush and blend in circular motions. For cream or liquid highlighter, try it all. Use a damp sponge or your fingers and blend in a tapping or stippling motion. Keep blending until you can't see any visible lines or edges.
Setting Your Masterpiece
Once you’re happy with your blend, you might want to set your highlighter to help it last longer. If you've used a powder highlighter, you can lightly dust a translucent setting powder over your entire face. If you've used a cream or liquid highlighter, you can use a setting spray to lock everything in place. This will also give the make up a more dewy, natural blend.
Touch-Ups Throughout the Day
Depending on your skin type and the weather, your highlighter may start to fade throughout the day. If you need a touch-up, simply reapply a small amount of product to the high points of your face and blend it out. Keep a small travel-sized highlighter and a brush or sponge in your bag for on-the-go touch-ups.
Conclusion: Glow Forth and Conquer!
And there you have it! Five simple steps to achieve perfect highlighter coverage. Remember, practice makes perfect, so don't be afraid to experiment with different products and techniques until you find what works best for you. Ultimately, makeup, and especially highlighter, should be fun! Don’t stress about getting it “perfect.” It’s about enhancing your natural beauty and feeling confident in your own skin. So go forth, glow forth, and conquer the world (or, you know, just your next Zoom meeting)! You got this!